Emergency Light Issues & Repairs: Common Problems and Solutions Guide
You’ve probably noticed those emergency lights in hallways, stairwells, and offices. They’re typically a fairly unobtrusive part of the building, just sitting there until they’re really needed. But what happens when they are needed and they don’t work? That’s a serious problem, of course. The good news is that many common issues with emergency lighting systems can be identified and fixed with a bit of know-how. This guide will walk you through the usual culprits behind emergency light malfunctions and offer practical solutions to get them back in working order, helping ensure safety when the power goes out.
Understanding Your Emergency Lighting System
Before diving into fixes, it’s helpful to understand the basics of how these lights operate. Most emergency lighting systems are designed to illuminate automatically when the normal power supply fails. They rely on an internal battery, which is constantly charged by the building’s main power. When the main power drops, a transfer switch activates, and the battery powers the light. After the main power returns, the system switches back, and the battery begins recharging.
There are generally two main types you’ll encounter:
Self-Contained Emergency Luminaires
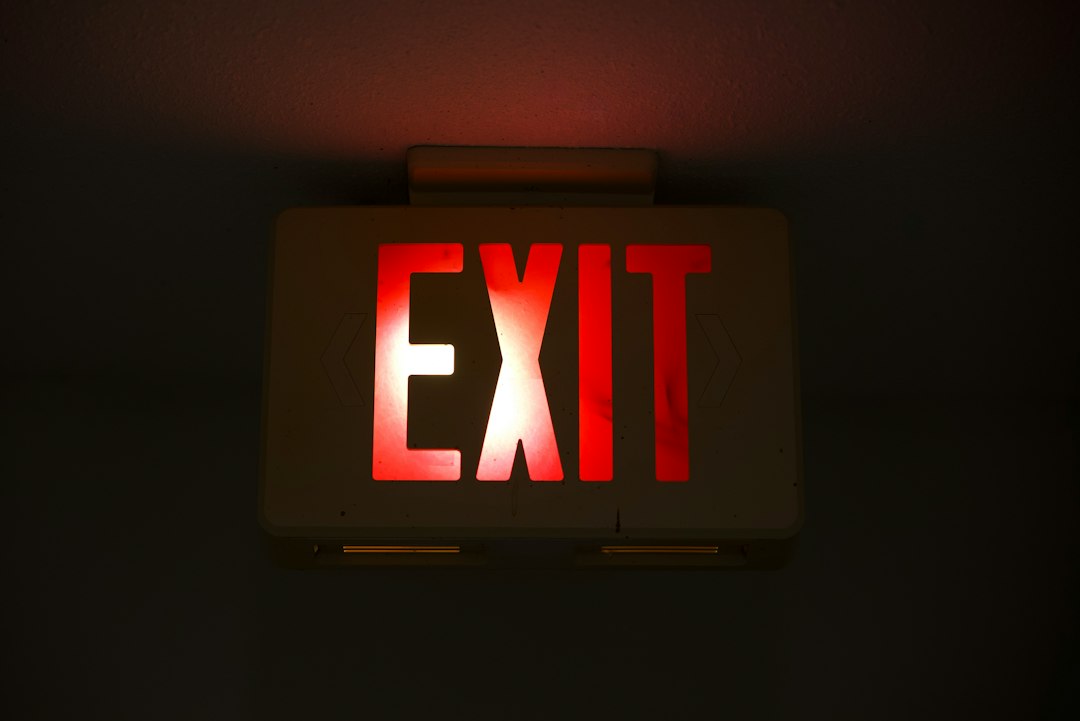
These are the most common and are what most people picture when they think of emergency lights. Each unit contains its own battery, charger, and lamp(s). They’re independent and relatively easy to install. Think of the twin-head units often found above exits or the single-lamp units integrated into exit signs. Their simplicity makes troubleshooting often isolated to the individual unit.
Central Battery Systems
Less common in smaller buildings but prevalent in larger complexes, these systems use a single, large battery bank to power multiple emergency luminaires throughout the building. The battery bank, charger, and control panel are usually located in a dedicated room. While more complex, they offer advantages in terms of maintenance and lifespan for the batteries. Troubleshooting here often involves checking the central unit before individual lights.
Maintained vs. Non-Maintained Operation
This refers to how the light operates under normal power conditions.
- Non-maintained lights are off under normal power and only illuminate when the main power fails. Most standard emergency lights are non-maintained.
- Maintained lights are on continuously under normal power (like a regular corridor light) and remain on when the main power fails, drawing power from their battery. Exit signs are often maintained, as they need to be visible at all times.
- Sustained (or sometimes called “combination”) lights are a hybrid. They contain two sets of lamps: one for normal illumination (powered by mains) and one for emergency illumination (powered by battery). When mains fail, the emergency lamps activate.
Knowing which type you have helps narrow down potential issues. For instance, a maintained light that’s off under normal power has a different set of potential problems than a non-maintained light that simply fails to activate during a power cut.
Common Power and Battery Problems
The vast majority of emergency light issues stem from power supply or battery-related faults. It makes sense, given their reliance on a constant charge and a ready-to-go battery.
No Power to the Unit
This is often the most straightforward problem to diagnose. If a self-contained emergency light isn’t charging or indicating any life, the first check should always be the power supply.
- Blown Fuse/Tripped Breaker: Like any electrical appliance, emergency lights are protected by a fuse or circuit breaker. If the circuit supplying power to the light (or group of lights) has a blown fuse or a tripped breaker, the unit won’t receive power to charge its battery.
- Solution: Locate the electrical panel. Identify the breaker or fuse associated with the emergency lighting circuit. If it’s tripped (usually halfway between ON and OFF), switch it completely OFF, then back to ON. If it’s a fuse, replace it with one of the correct amperage.
- Loose Wiring: Over time, vibrations or improper initial installation can lead to loose wire connections at the light fixture itself or within the junction box supplying power.
- Solution: Always turn off power at the breaker first! Carefully open the fixture and check the wire terminals. Ensure all wires are securely fastened. If you’re not comfortable with electrical wiring, it’s best to call a qualified electrician.
- Faulty Switch: Some emergency lights are connected to a switched circuit, though this is less common for dedicated emergency fixtures. If there’s an upstream switch that’s off, the unit won’t get power.
- Solution: Ensure any associated wall switches are in the ON position.
Dead or Failing Battery
The battery is the heart of an emergency light system. If it’s old, hasn’t been properly maintained, or has failed internally, the light won’t function when needed. This is by far the most frequent issue.
- Age: Batteries have a finite lifespan, typically 3-5 years for most sealed lead-acid or NiCad batteries used in self-contained units. As they age, their capacity to hold a charge diminishes.
- Solution: If the light fails its monthly or annual test (doesn’t stay on for the required duration), the battery likely needs replacing. Check the manufacturing date on the battery or the installation date if recorded.
- Poor Charging: Even a relatively new battery can fail if it’s not being charged correctly. This could be due to a fault in the charging circuit within the light unit itself.
- Solution: First, ensure the unit is receiving mains power. If it is, and the battery still isn’t holding a charge after several hours, the internal charger might be faulty, or the battery is simply defective. Try replacing the battery first. If the problem persists, the entire unit may need replacement.
- Deep Discharge/Overcharge: While less common with modern intelligent chargers, older systems or faulty chargers can sometimes deep-discharge a battery (leaving it completely drained for too long) or overcharge it, significantly shortening its life.
- Solution: Regular testing (as per regulations) helps prevent deep discharge. If overcharging is suspected, and the battery is failing prematurely, it points to a faulty charging circuit in the unit.
- Corroded Terminals: Battery terminals can corrode over time, especially in damp environments, preventing proper electrical contact.
- Solution: Disconnect power first. Carefully clean any corrosion from battery terminals using a wire brush or a baking soda and water solution. Ensure a good, tight connection.
Indicator Light Issues
Most emergency lights have a small LED indicator. A green light usually means it’s receiving power and charging. Other colors or a flashing pattern can signal a fault.
- No Indicator Light: If there’s no indicator light at all, the unit is likely not receiving mains power.
- Solution: Check the breaker/fuse and wiring as described above.
- Red or Amber Indicator Light (or Flashing): This usually signals a fault, often with the battery or charger circuit. The specific meaning can vary between manufacturers, so consult the unit’s manual.
- Solution: Perform a manual test. If the light doesn’t stay on for the required duration, the battery is the prime suspect. Replace the battery. If the fault indicator persists after a full recharge cycle with a new battery, the charging circuit or internal electronics of the unit may be faulty, requiring replacement of the entire fixture.
Common Lamp and Fixture Problems
Once you’ve ruled out power and battery issues, the next area to investigate is the light source itself and the overall integrity of the fixture.
Dead or Dim Lamps (Bulbs)
This is more common with older fluorescent or incandescent emergency lights. Modern LED units are much more durable but can still fail.
- Burned Out Bulb: Like any light bulb, they eventually fail.
- Solution: For traditional incandescent or fluorescent lamps, carefully remove the old bulb and replace it with a new one of the correct type and wattage. Ensure the power is off before doing this.
- Faulty LED Array: While rare, individual LEDs or entire LED arrays can fail. Sometimes you might see a dim light or only a few LEDs working.
- Solution: LED emergency lights usually have integrated, non-replaceable LEDs. If the LED array fails, the entire fixture typically needs to be replaced. Attempting to repair individual LEDs is usually not cost-effective or practical.
- Poor Connection: For removable bulbs, a loose or corroded connection in the lamp holder can prevent the bulb from lighting up.
- Solution: With power off, gently clean the contacts in the lamp holder and ensure the bulb is securely seated.
Dimming or Flickering Light
This usually indicates an issue with the power supply to the lamp or the lamp itself.
- Failing Battery: A battery that’s nearing the end of its life might not be able to supply full power, causing the lamps to appear dim during a power outage.
- Solution: Replace the battery.
- Loose Wiring to the Lamp: Similar to mains wiring, internal wiring to the lamp itself can become loose.
- Solution: With power off, check the connections from the internal circuit board to the lamp holder or LED array. Tighten any loose connections.
- Faulty Ballast (for Fluorescent): If you have fluorescent emergency lights, a failing ballast can cause dimming or flickering.
- Solution: Replace the ballast. This can be a bit more involved and might warrant replacing the entire fixture if it’s an older, less efficient unit.
- Damaged Lens or Diffuser: While not an electrical fault, a dirty, cracked, or yellowed lens can significantly reduce the perceived brightness of the light.
- Solution: Clean the lens with a damp cloth. If it’s cracked or severely discolored, check if a replacement lens is available, or consider replacing the entire fixture.
Physical Damage to the Fixture
Emergency lights are often placed in high-traffic areas where they can be bumped or exposed to environmental factors.
- Impact Damage: A direct hit can crack the casing, damage internal components, or break lamp covers.
- Solution: Assess the extent of the damage. Minor cracks might be cosmetic, but if internal components are affected, the fixture will likely need to be replaced.
- Water Ingress: If installed in a damp location without proper IP rating, water can get inside and damage electronics.
- Solution: Immediately disconnect power. If there’s visible water, the unit is likely compromised and needs replacement. Consider relocating or installing an appropriately rated fixture for the environment.
- Vandalism: Unfortunately, emergency lights can sometimes be targets of vandalism.
- Solution: Replace the damaged fixture. Consider installing tougher, vandal-resistant units in areas prone to such issues.
Testing and Maintenance Procedures
Regular testing and maintenance are crucial for ensuring your emergency lighting system works when you need it most. It also helps in early detection of issues before they become critical.
Monthly Function Test
This is a quick check to ensure the light actually turns on.
- How to Perform: Briefly simulate a power failure by pressing the “test” button on the emergency light or by switching off the circuit breaker that powers the emergency lights (for systems without individual test buttons).
- What to Look For: Ensure all emergency lights illuminate immediately and stay on for at least a few seconds. For non-maintained lights, confirm they switch off when power is restored. For maintained lights, confirm they switch to battery power and remain illuminated. Check that any charging indicator lights return to normal (usually green) after the test.
- Record Keeping: Keep a log of these tests, noting the date, which lights were tested, and any issues found. This is often a legal requirement.
Annual Full Duration Test
This is a more thorough test to ensure the battery can sustain the light for its full rated duration (e.g., 90 minutes or 3 hours, depending on local regulations).
- How to Perform: Simulate a complete power failure to the emergency lighting circuit (or use the test button if it initiates a full discharge). Leave the power off for the entire rated duration.
- What to Look For: After the duration, ensure all emergency lights are still illuminated and providing adequate light. Visually inspect all lights for proper operation.
- Recharging: After the test, restore mains power and allow sufficient time for the batteries to fully recharge (this can take 24 hours or more).
- Record Keeping: Again, meticulously record the date, duration, and results of the test. Any units that fail to meet the required duration need immediate battery replacement or fixture repair/replacement.
General Maintenance Tips
Beyond testing, a few simple practices can extend the life of your emergency lights.
- Keep it Clean: Dust, dirt, and debris can accumulate on fixtures, blocking light output and potentially causing internal heat buildup. Gently wipe down units periodically.
- Inspect for Damage: During your monthly checks, do a quick visual inspection for any physical damage, loose covers, or signs of water ingress.
- Monitor Indicator Lights: Regularly glance at the indicator lights. A change from green to red/amber or flashing is a quick alert that something needs attention.
- Battery Replacement Schedule: Even if a battery passes its annual test, it’s wise to plan for replacement around the 4-5 year mark, especially in critical areas, to prevent unexpected failures.
- Professional Servicing: For larger or more complex central battery systems, or if you’re uncomfortable performing electrical work, consider engaging a qualified electrician or emergency lighting specialist for annual maintenance. They have the tools and expertise for more in-depth diagnostics.
Advanced Troubleshooting and When to Call a Professional
While many issues can be resolved with basic troubleshooting, there are times when it’s best to call in the experts. Knowing your limits is key to safety and effective resolution.
System-Wide Failures
If multiple emergency lights on the same circuit are failing simultaneously, or if you have a central battery system with widespread issues, the problem is likely upstream of the individual fixtures.
- Central Battery System Fault: For central systems, issues with the main charger, inverter, or the battery bank itself can cause all connected lights to fail.
- Solution: These systems are complex and require specialized knowledge. Do not attempt to repair unless you are a qualified technician. Call a professional.
- Main Distribution Board Issues: A problem at the main electrical panel (e.g., a faulty breaker, main fuse, or wiring) could cut power to an entire emergency lighting circuit.
- Solution: While you can check for tripped breakers, investigating further into the main panel should only be done by a licensed electrician.
- Control Panel Malfunctions: Central systems often have a control panel for monitoring and testing. If this panel is displaying errors or not functioning, it could be the root cause.
- Solution: Refer to the system’s manual for error codes. If simple resets don’t work, a professional technician for that specific system is needed.
Intermittent Problems
A light that works sometimes but not others can be particularly frustrating and difficult to diagnose.
- Loose Connections (Internal or External): A connection that’s just barely making contact can cause intermittent operation, especially with vibration or temperature changes.
- Solution: Carefully inspect all connections, both at the mains input and internally within the fixture. Tighten everything securely. Power off first!
- Faulty Circuit Board: The electronic components on a circuit board can fail intermittently due to heat, age, or manufacturing defects.
- Solution: This is typically beyond DIY repair for individual components. The entire fixture or the circuit board would need replacement.
- Environmental Factors: Extreme temperatures (hot or cold) can affect battery performance and electronic components, leading to intermittent failures.
- Solution: Ensure the emergency lights are installed within their specified operating temperature range. If not, consider alternative solutions or better climate control.
When to Call an Electrician or Specialist
It’s crucial to know when a problem is beyond simple troubleshooting and requires professional intervention.
- Any Main Electrical Panel Work: If the problem requires opening the main electrical panel, dealing with high voltage, or replacing circuit breakers, always call a licensed electrician.
- Complex Wiring Issues: If you suspect a break in the wiring within walls or ceilings, or if you’re dealing with conduit, an electrician is necessary.
- Central Battery System Repairs: These systems are highly specialized. Unless you are certified in maintaining them, always defer to a professional.
- Persistent Issues After Basic Troubleshooting: If you’ve tried all the common solutions (checking power, replacing battery, etc.) and the problem persists, it indicates a deeper electrical or component fault best handled by an expert.
- Safety Concerns: If you observe sparking, burning smells, or any signs of electrical hazard, immediately cut power to the affected circuit and call an electrician.
- Compliance and Regulations: Ensuring your emergency lighting system meets local building codes and safety regulations is paramount. Professionals are up-to-date on these requirements and can certify that your system is compliant.
By understanding the basic components, common failure points, and a structured approach to troubleshooting, you can handle many emergency light issues yourself. However, always prioritize safety and don’t hesitate to call a qualified professional when in doubt or facing complex electrical problems. A properly functioning emergency lighting system isn’t just a convenience; it’s a critical safety feature.